Instax Mini 8 Wall Mount
A form-fitting, asymmetrical wall mount for the Instax Mini 8 instant camera.
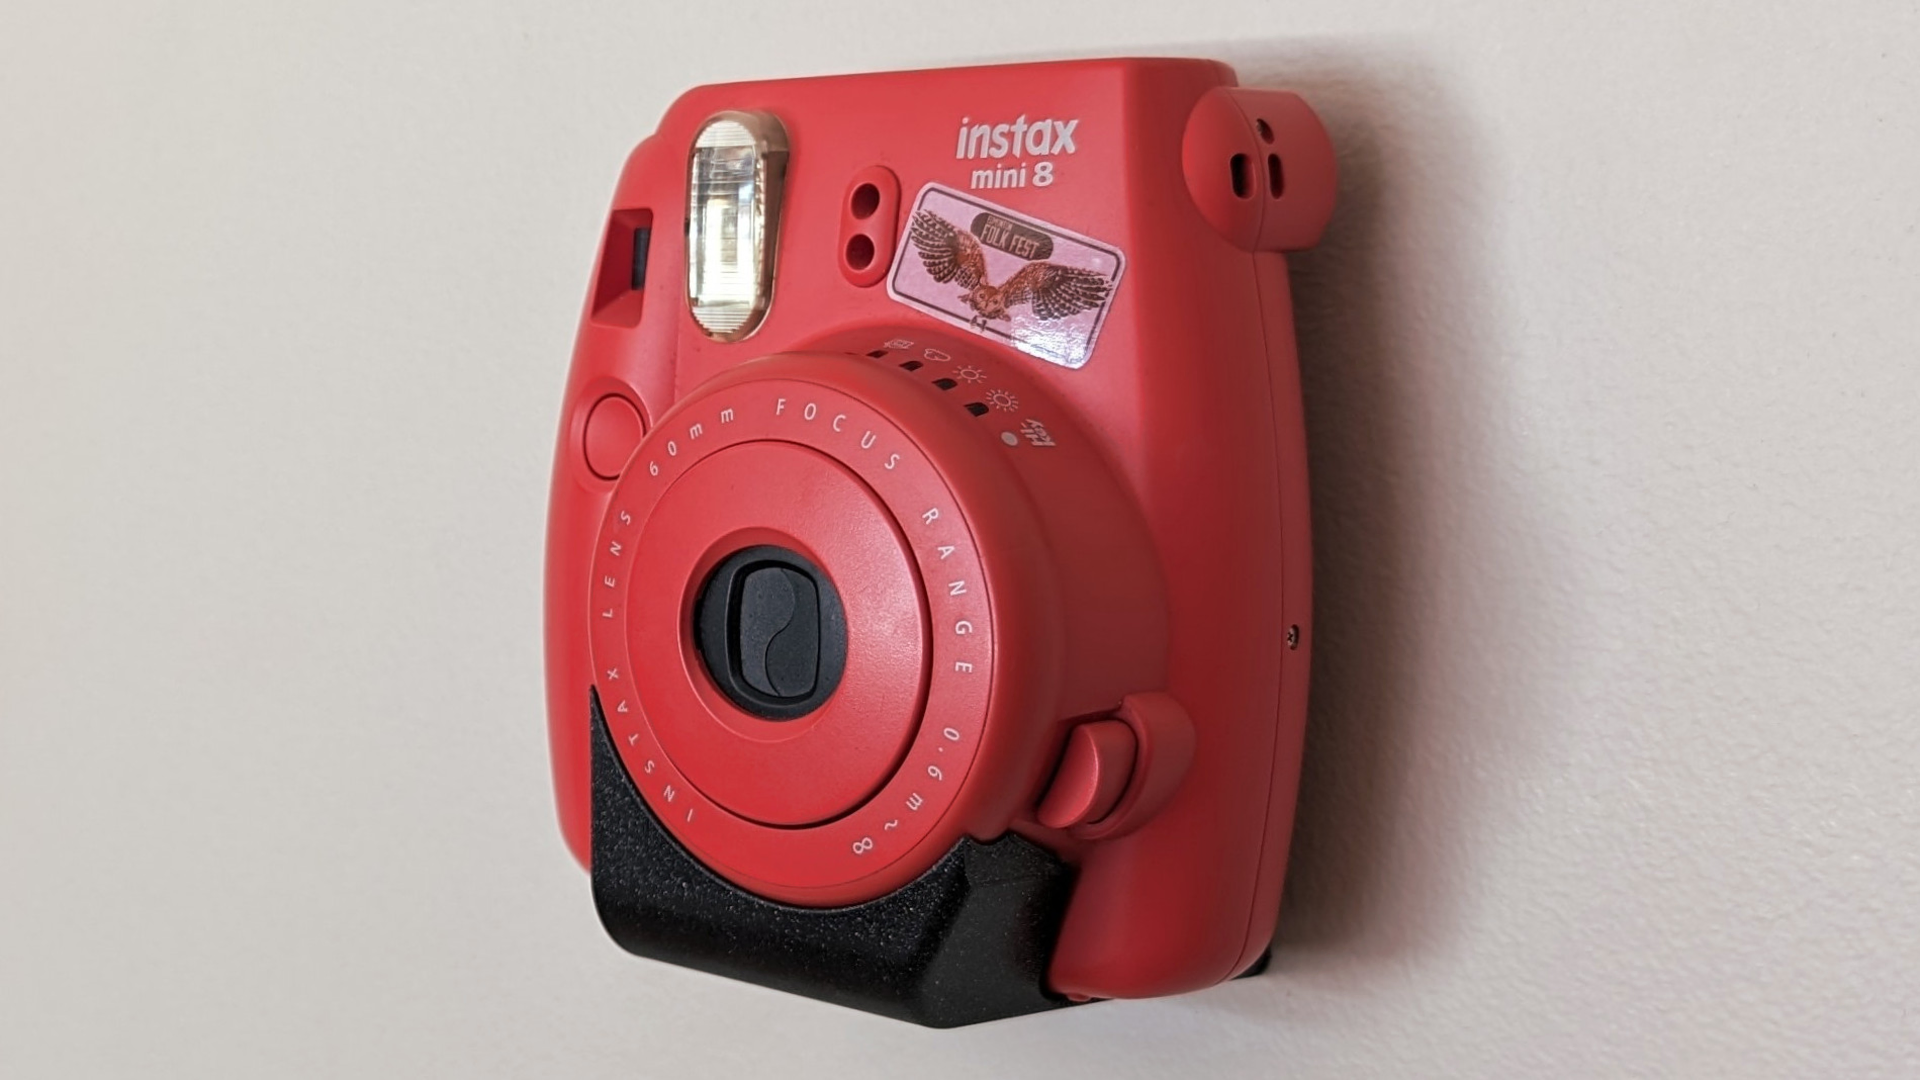
My partner has a large photo wall of instant film photos and wanted to display the camera alongside it, inviting our guests to add to the collage. I thus took on designing a somewhat stylish, easy-to-use, 3D-printed mount and landed with this! Overall, I’m quite happy with how it turned out; it was one of more geometrically-complex models I had designed to date and the close fit makes it very satisfying to use.
The final assembled model, cut for the removable back cover not shown
Design process
I initially thought I would create a full-width shelf with an indented impression of the camera’s bottom surface to sit in, but quickly realized that the pillowy, curving shape of the camera body was going to make that quite difficult. Not only are the curves of a bottom silhouette somewhat complex, their radii also change along the height of the camera, so any measuring or tracing had to be done relative to the indentation’s depth. This idea had other problems too; it seemed it might look a bit bulkier than I wanted, and the camera is somewhat front-heavy, so I worried it would be wobbly sitting on a shelf.
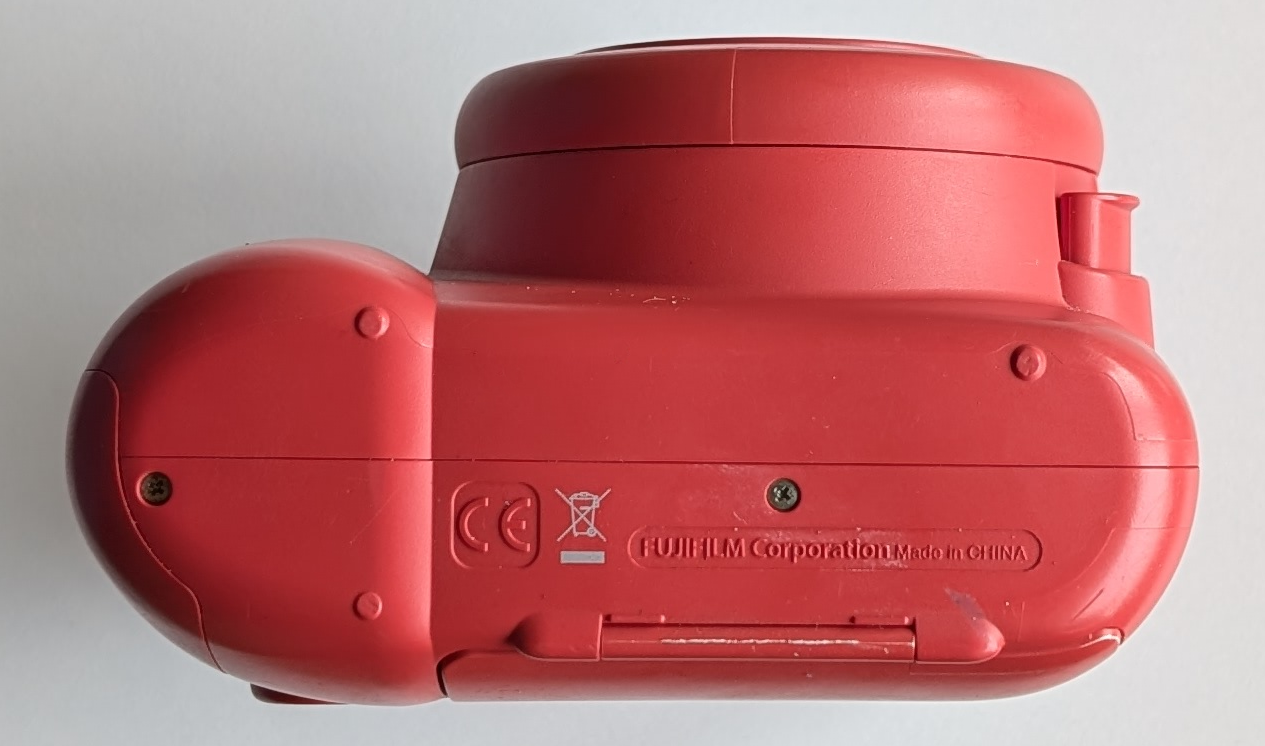
The bottom of the camera
I therefore pivoted to the narrower design which cradled the lens. This addressed the visual bulk and the camera’s front-heaviness, but more importantly, it limited the model to the easier-to-model rectangular middle section of the camera’s bottom surface. Additionally, the lens cradle serves to center the camera left-to-right when placing it in the mount.
I started by developing the side profile of the model, first focusing on the lens fit with thin, quick prints that could just be held up to the camera body (1-6 below). Iterations 7 and 8 briefly went full width to validate the revolve cut for the lens, but the thin cross section returned to tune the profile at the rear of the camera (9-14, though #9 seems to have gone missing).
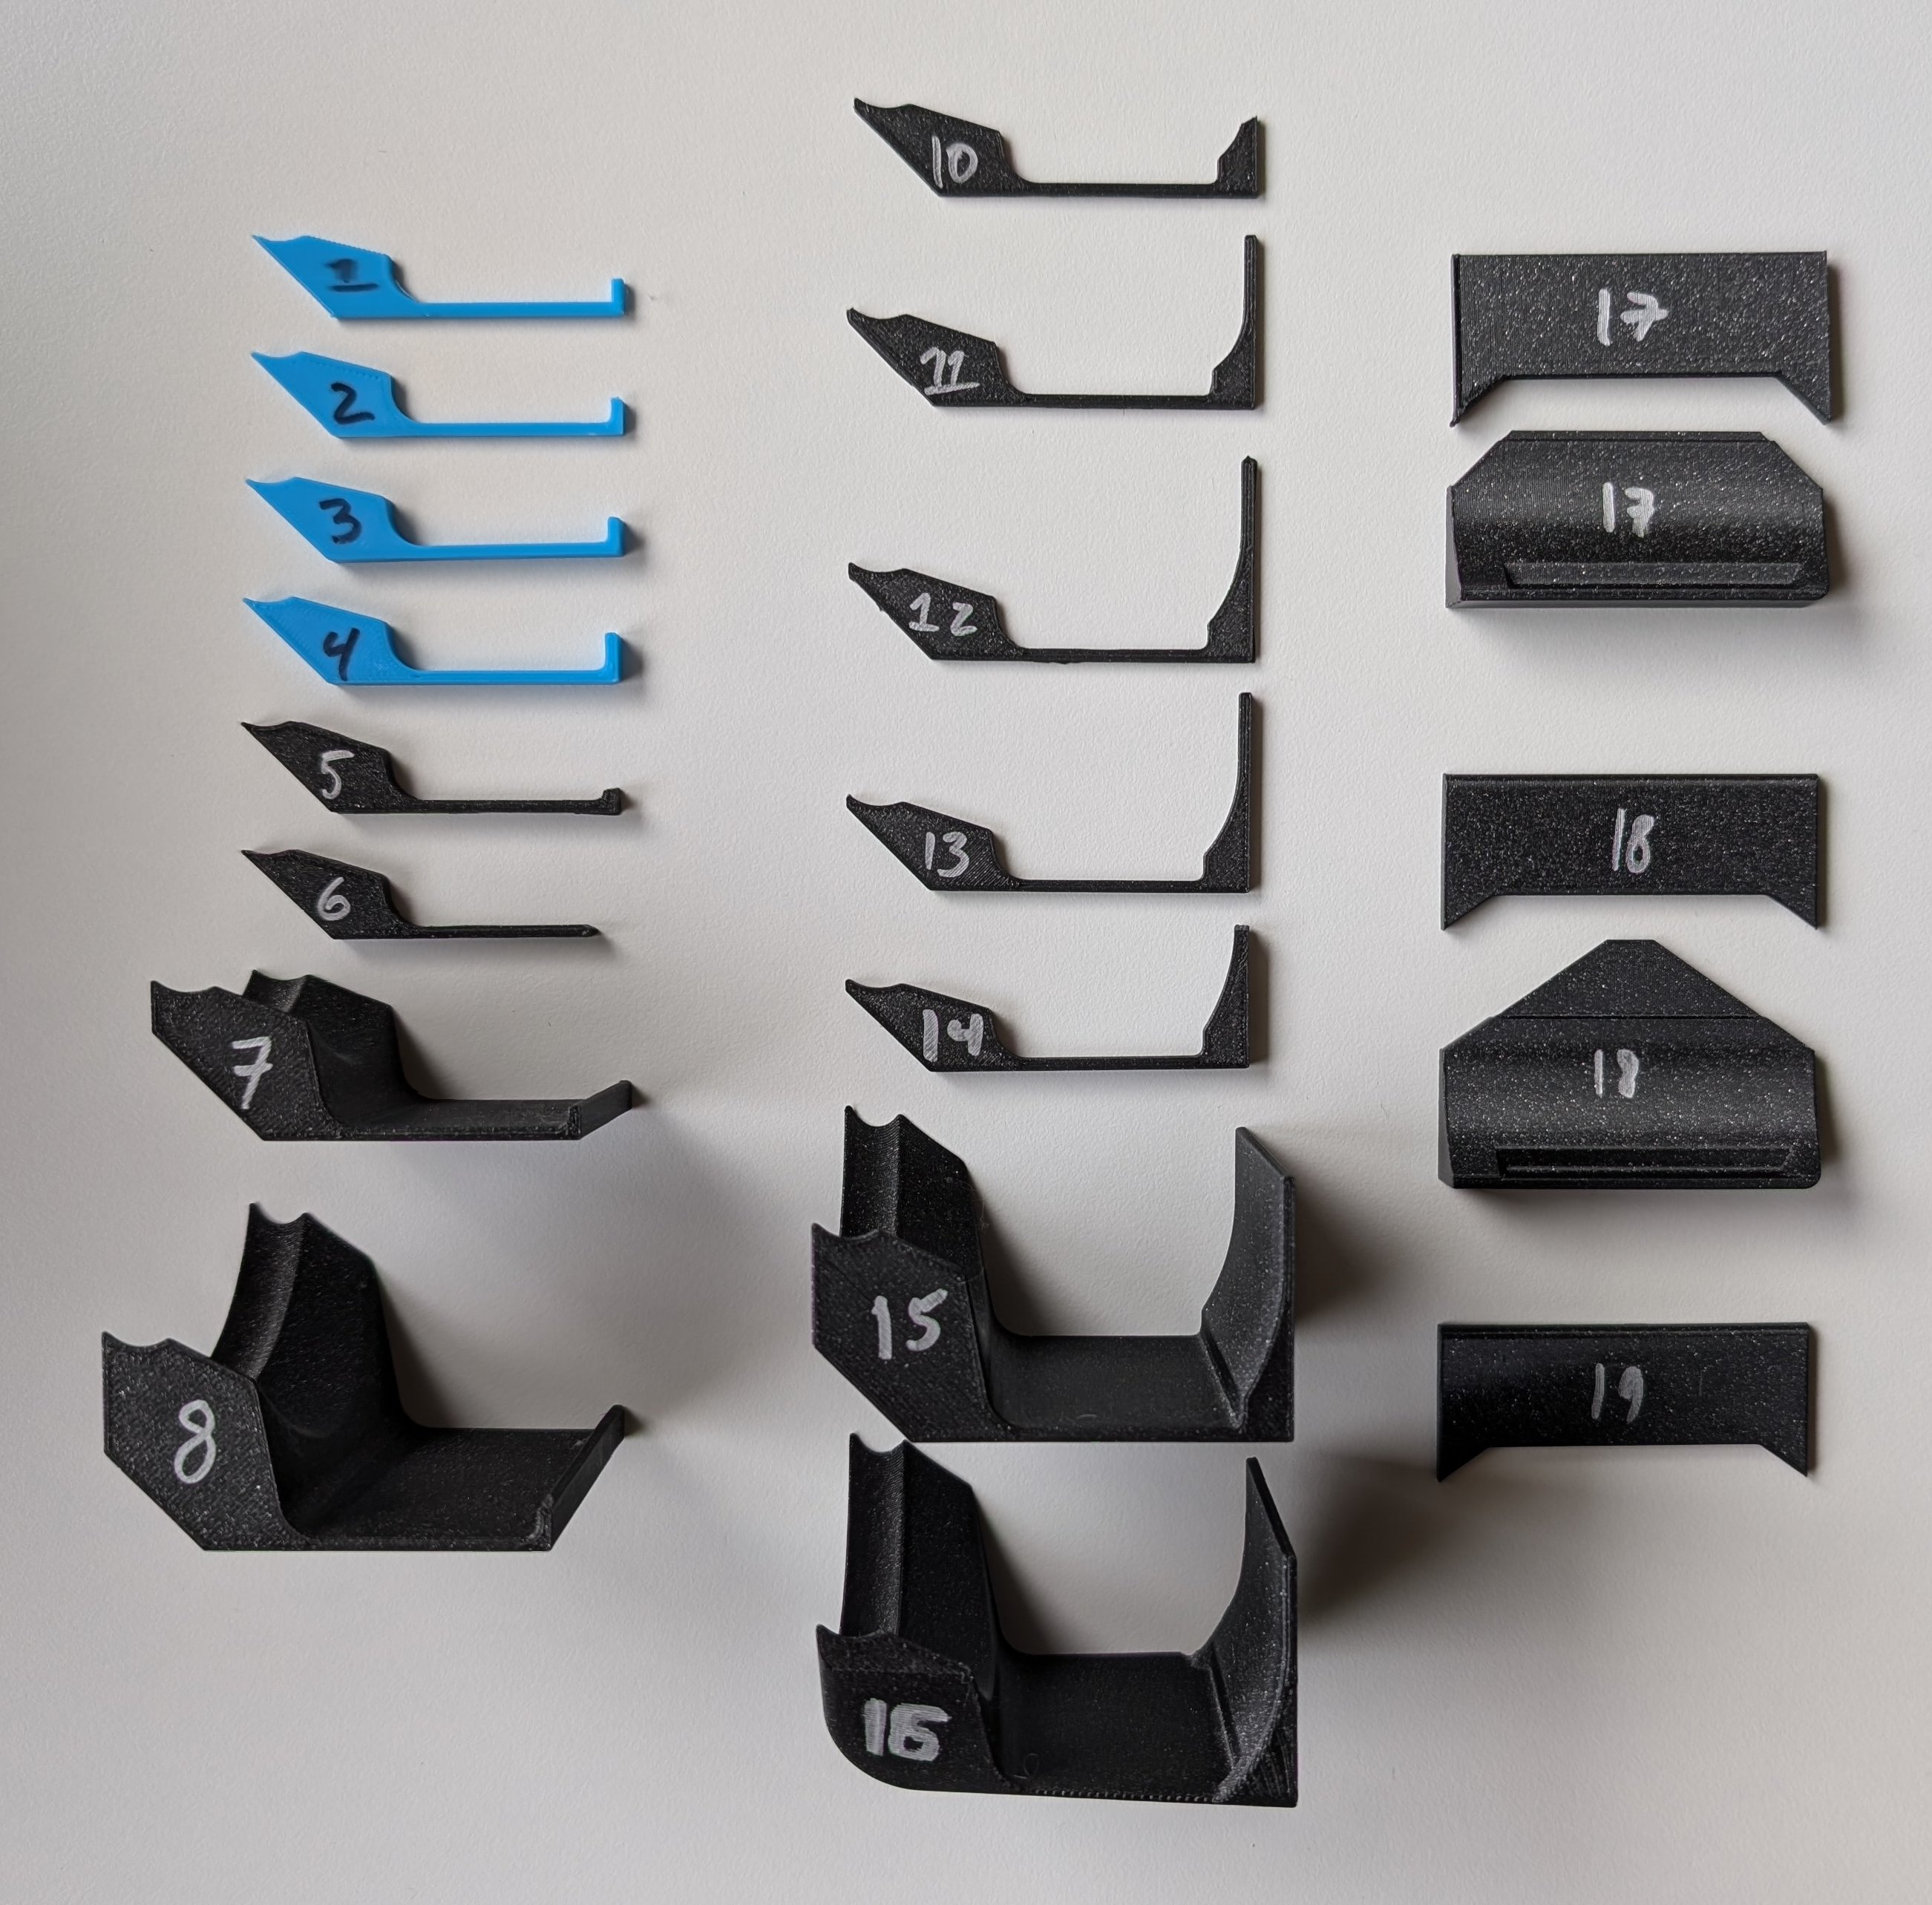
The design progression
Iteration 15 was the first full print to test the overall fit and 16 introduced the lofted, twisting cut on the right side seen in the final model. This added a bit of asymmetrical styling to the front view, but also cleverly cut the model back to avoid any visible gap where the camera body started to curve and slope away. Finally, the last couple iterations introduced the removable cover to give access to the pull tabs of the mounting 3M strips.